HOW TO MAKE A LEGO BATMAN PIÑATA
It’s my son’s birthday in a couple of weeks and we have been working on some things for his party. One thing we always have at our parties are Piñatas. This year the party theme is Super hero, and so my son, now he is of that age where he knows his own mind, wanted a Lego Batman Piñata. After a quick hunt to the regular party shops who wanted between £15 and £25 for an empty piñata and no luck finding a batman one, I decided to give it a go and make my own.
The Materials you will need are as follows:
- Cardboard, big enough for your design
- A ruler
- Scissors
- Stanley knife (not essential but handy)
- Strong string
- Staple gun
- Sticker Paper and a Printer
- Crepe Streamer Roll in the colours you need for your project (I bought Black)
- Masking Tape
- PVA Glue
- Chalk
Lets get started!
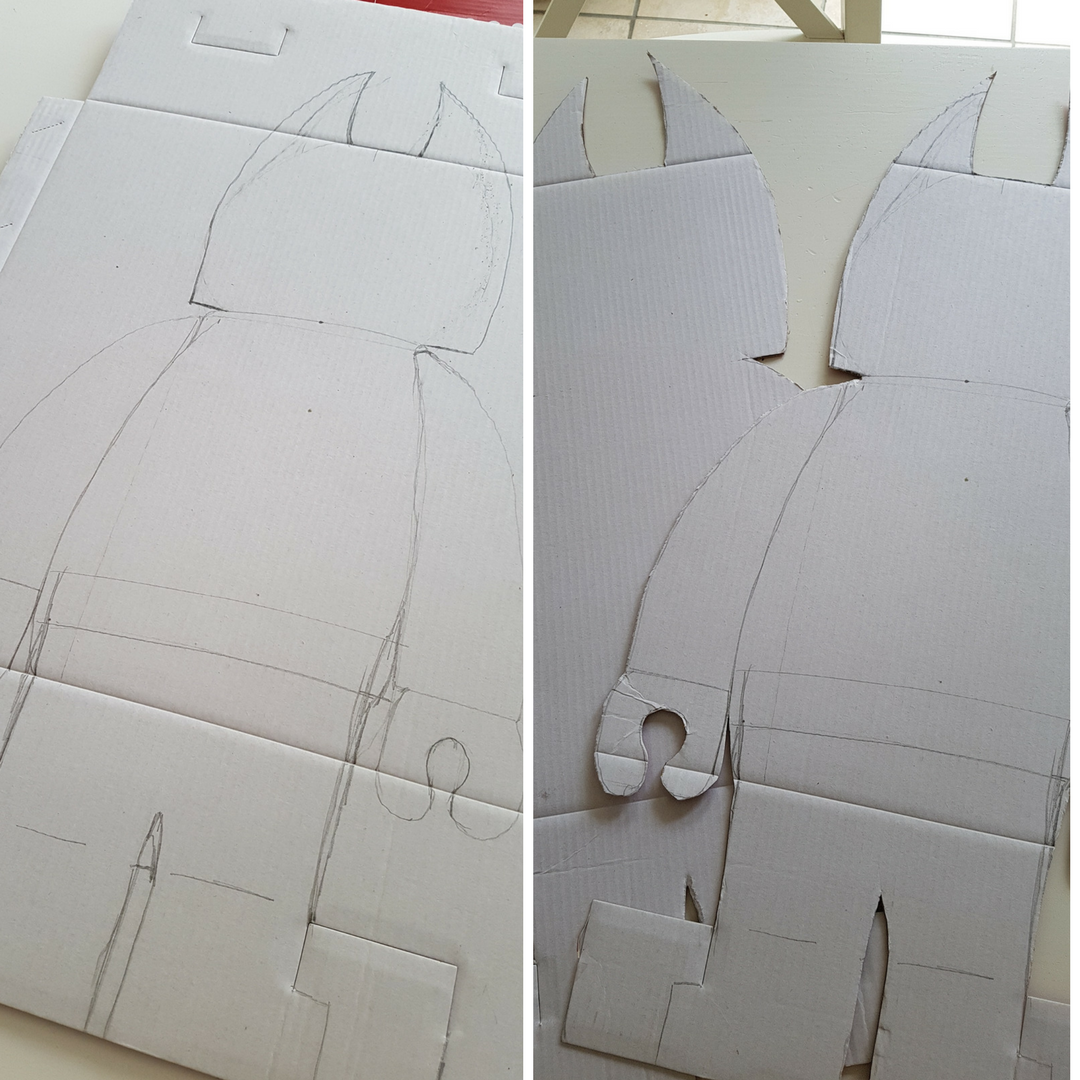
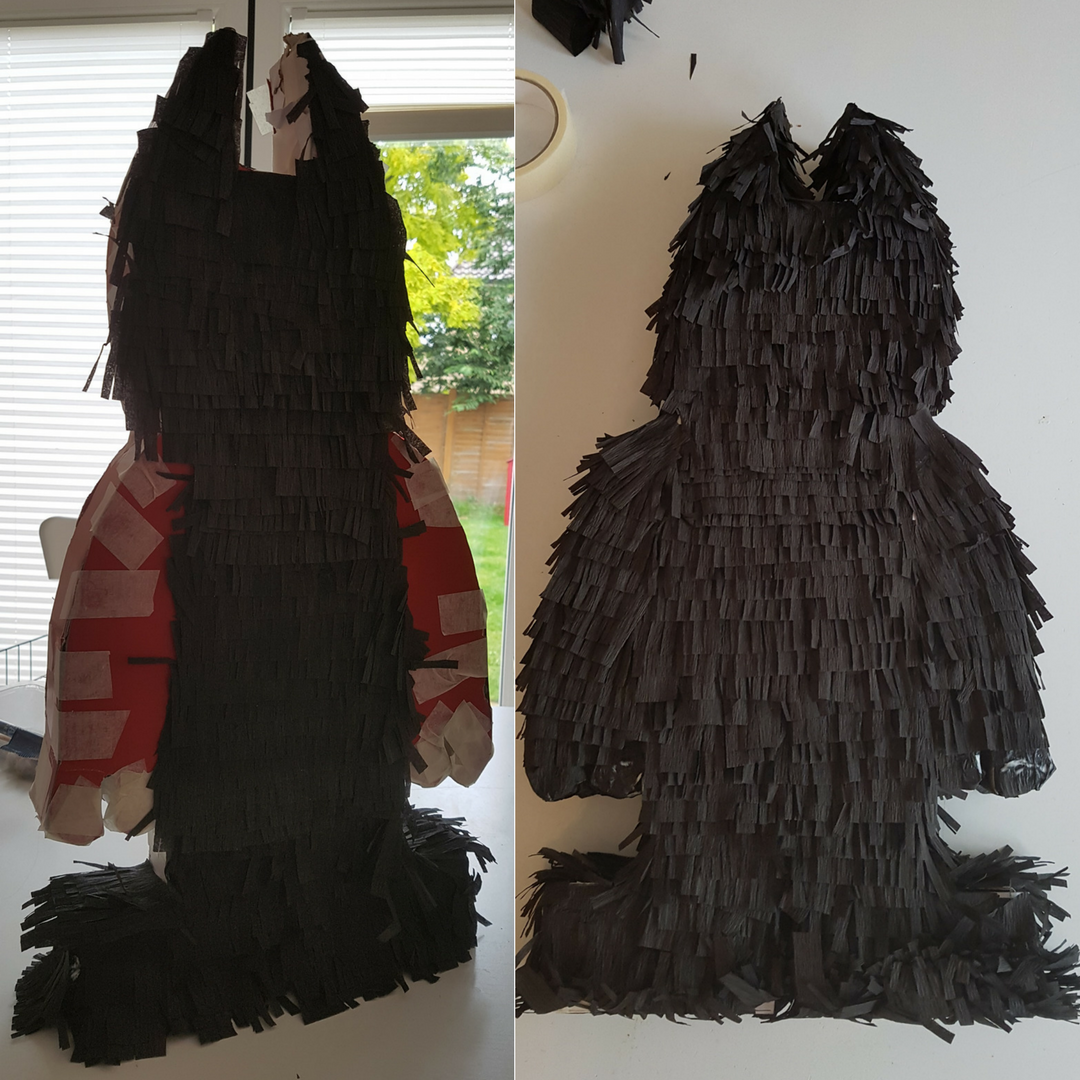
The first step is to draw the outline of your design onto a piece of card and then cut this out twice. Using a stanley knife is slightly easier than scissors for this process.
Then once you have 2 pieces of card, you need to cut strips of card for the edges. We cut 5cm strips, but would have probably looked better with 7cm.
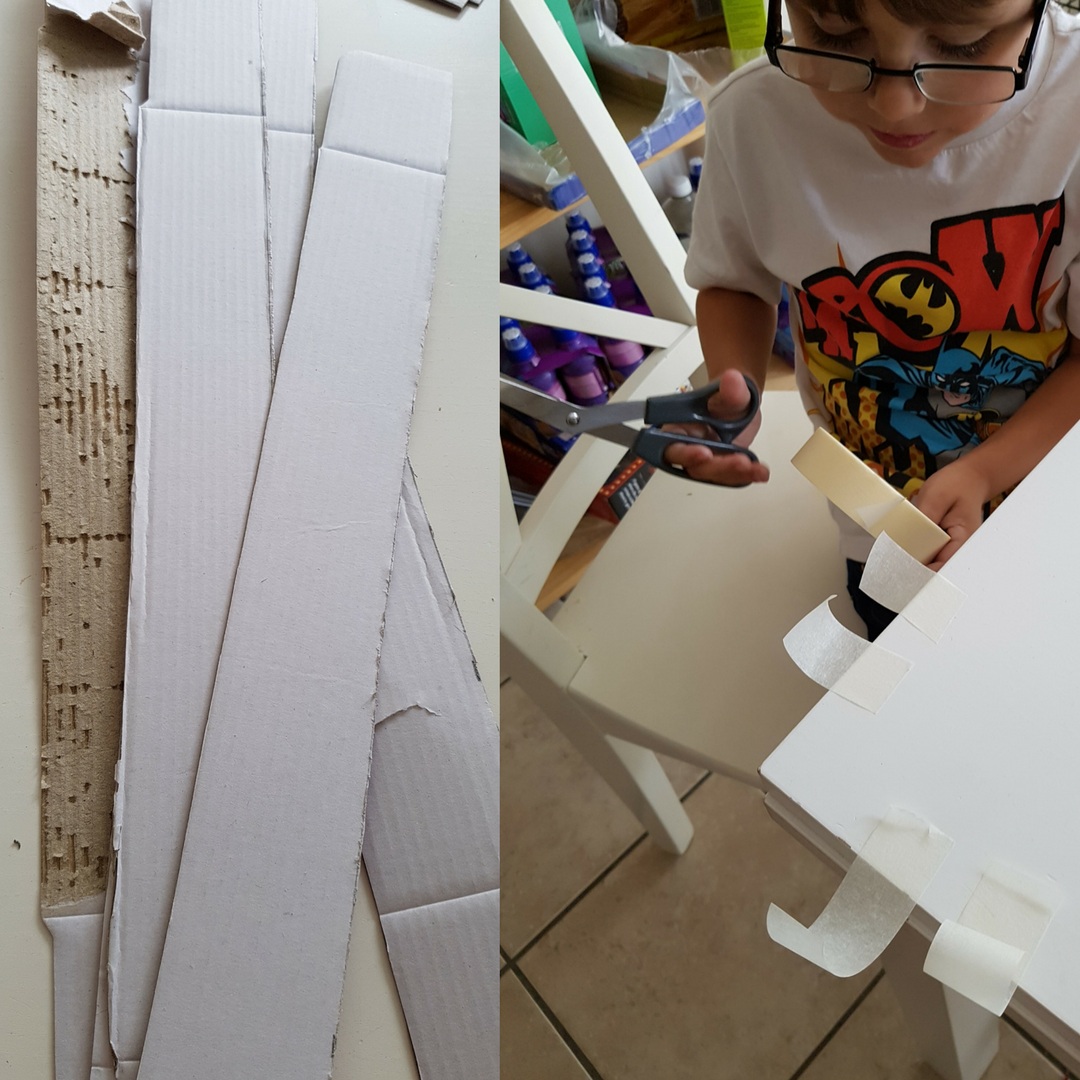
Once these strips are cut, prepare your masking tape. We cut lots of little strips of masking tape and taped them to the edge of the table for easy access. Then use one of the cardboard pieces you cut and gradually and carefully tape the edge strips around the edge of the card as displayed in the image. Do this all the way around until you get to the top, you will need to leave a gap at the top to add your sweets. Once all the edges are taped, this would be a good time to staple your string to the top. (we forgot about this part and caused us a couple of issues later)
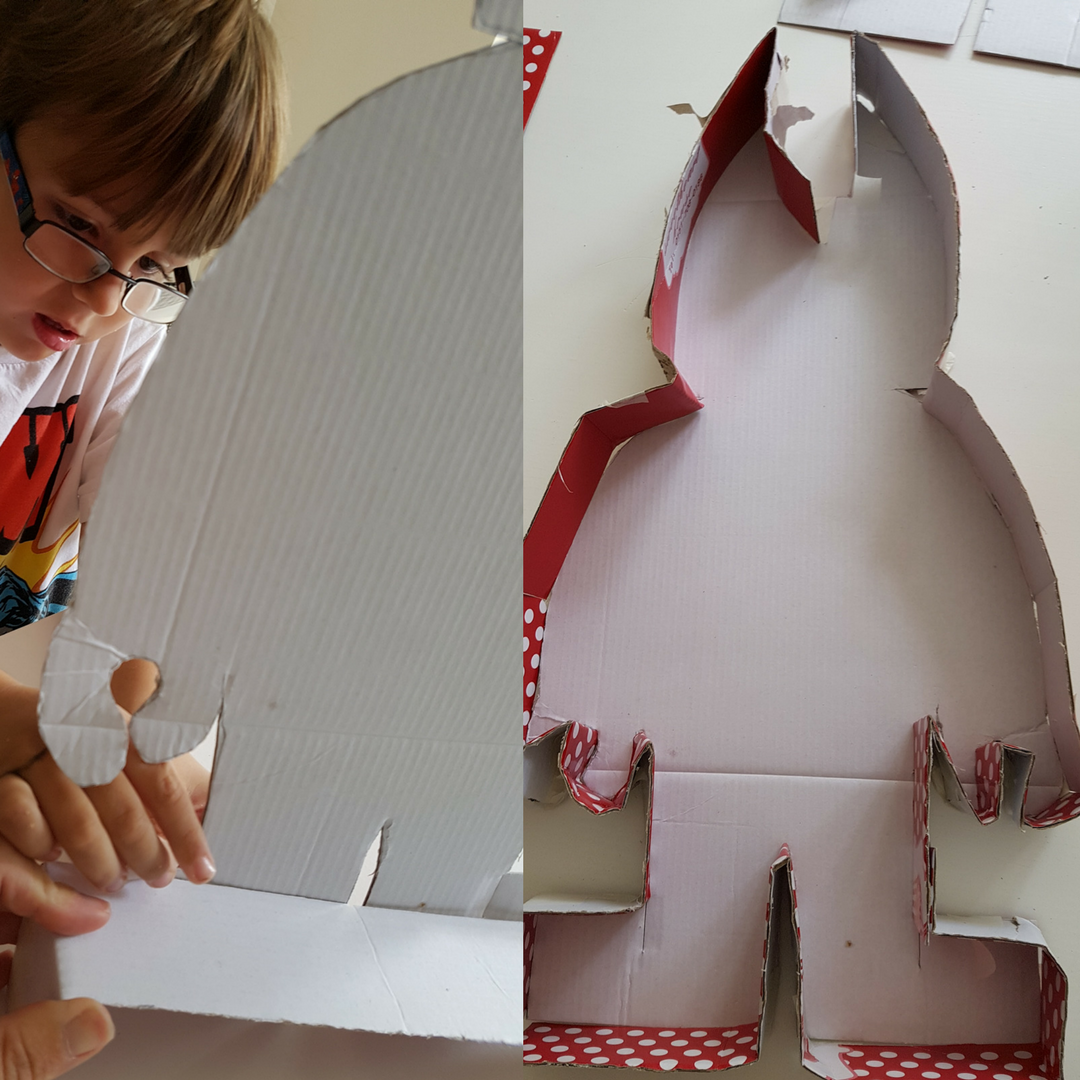
The next step is to then tape the other side on, using the same process as before, slow and steady with lots of tape. But bare in mind you want the children to be able to smash this up so don’t use too much tape, but enough to keep this together.
Once taped you should have a nice 3d box of your design

Then for the fun part! Roll your streamer out and fold a few times into a thin bundle and cut little slits ¾ of the way to create the ‘fringe’ on the crepe strips. By folding it, it saves you so much time as you can cut around 6x the amount at once.

Once you have your fringe, cover the cardboard in glue and add our fringe. Start bottom up, and layer the strips to build up the pattern. We covered the legs and body first and then the head and arms, to give more definition.
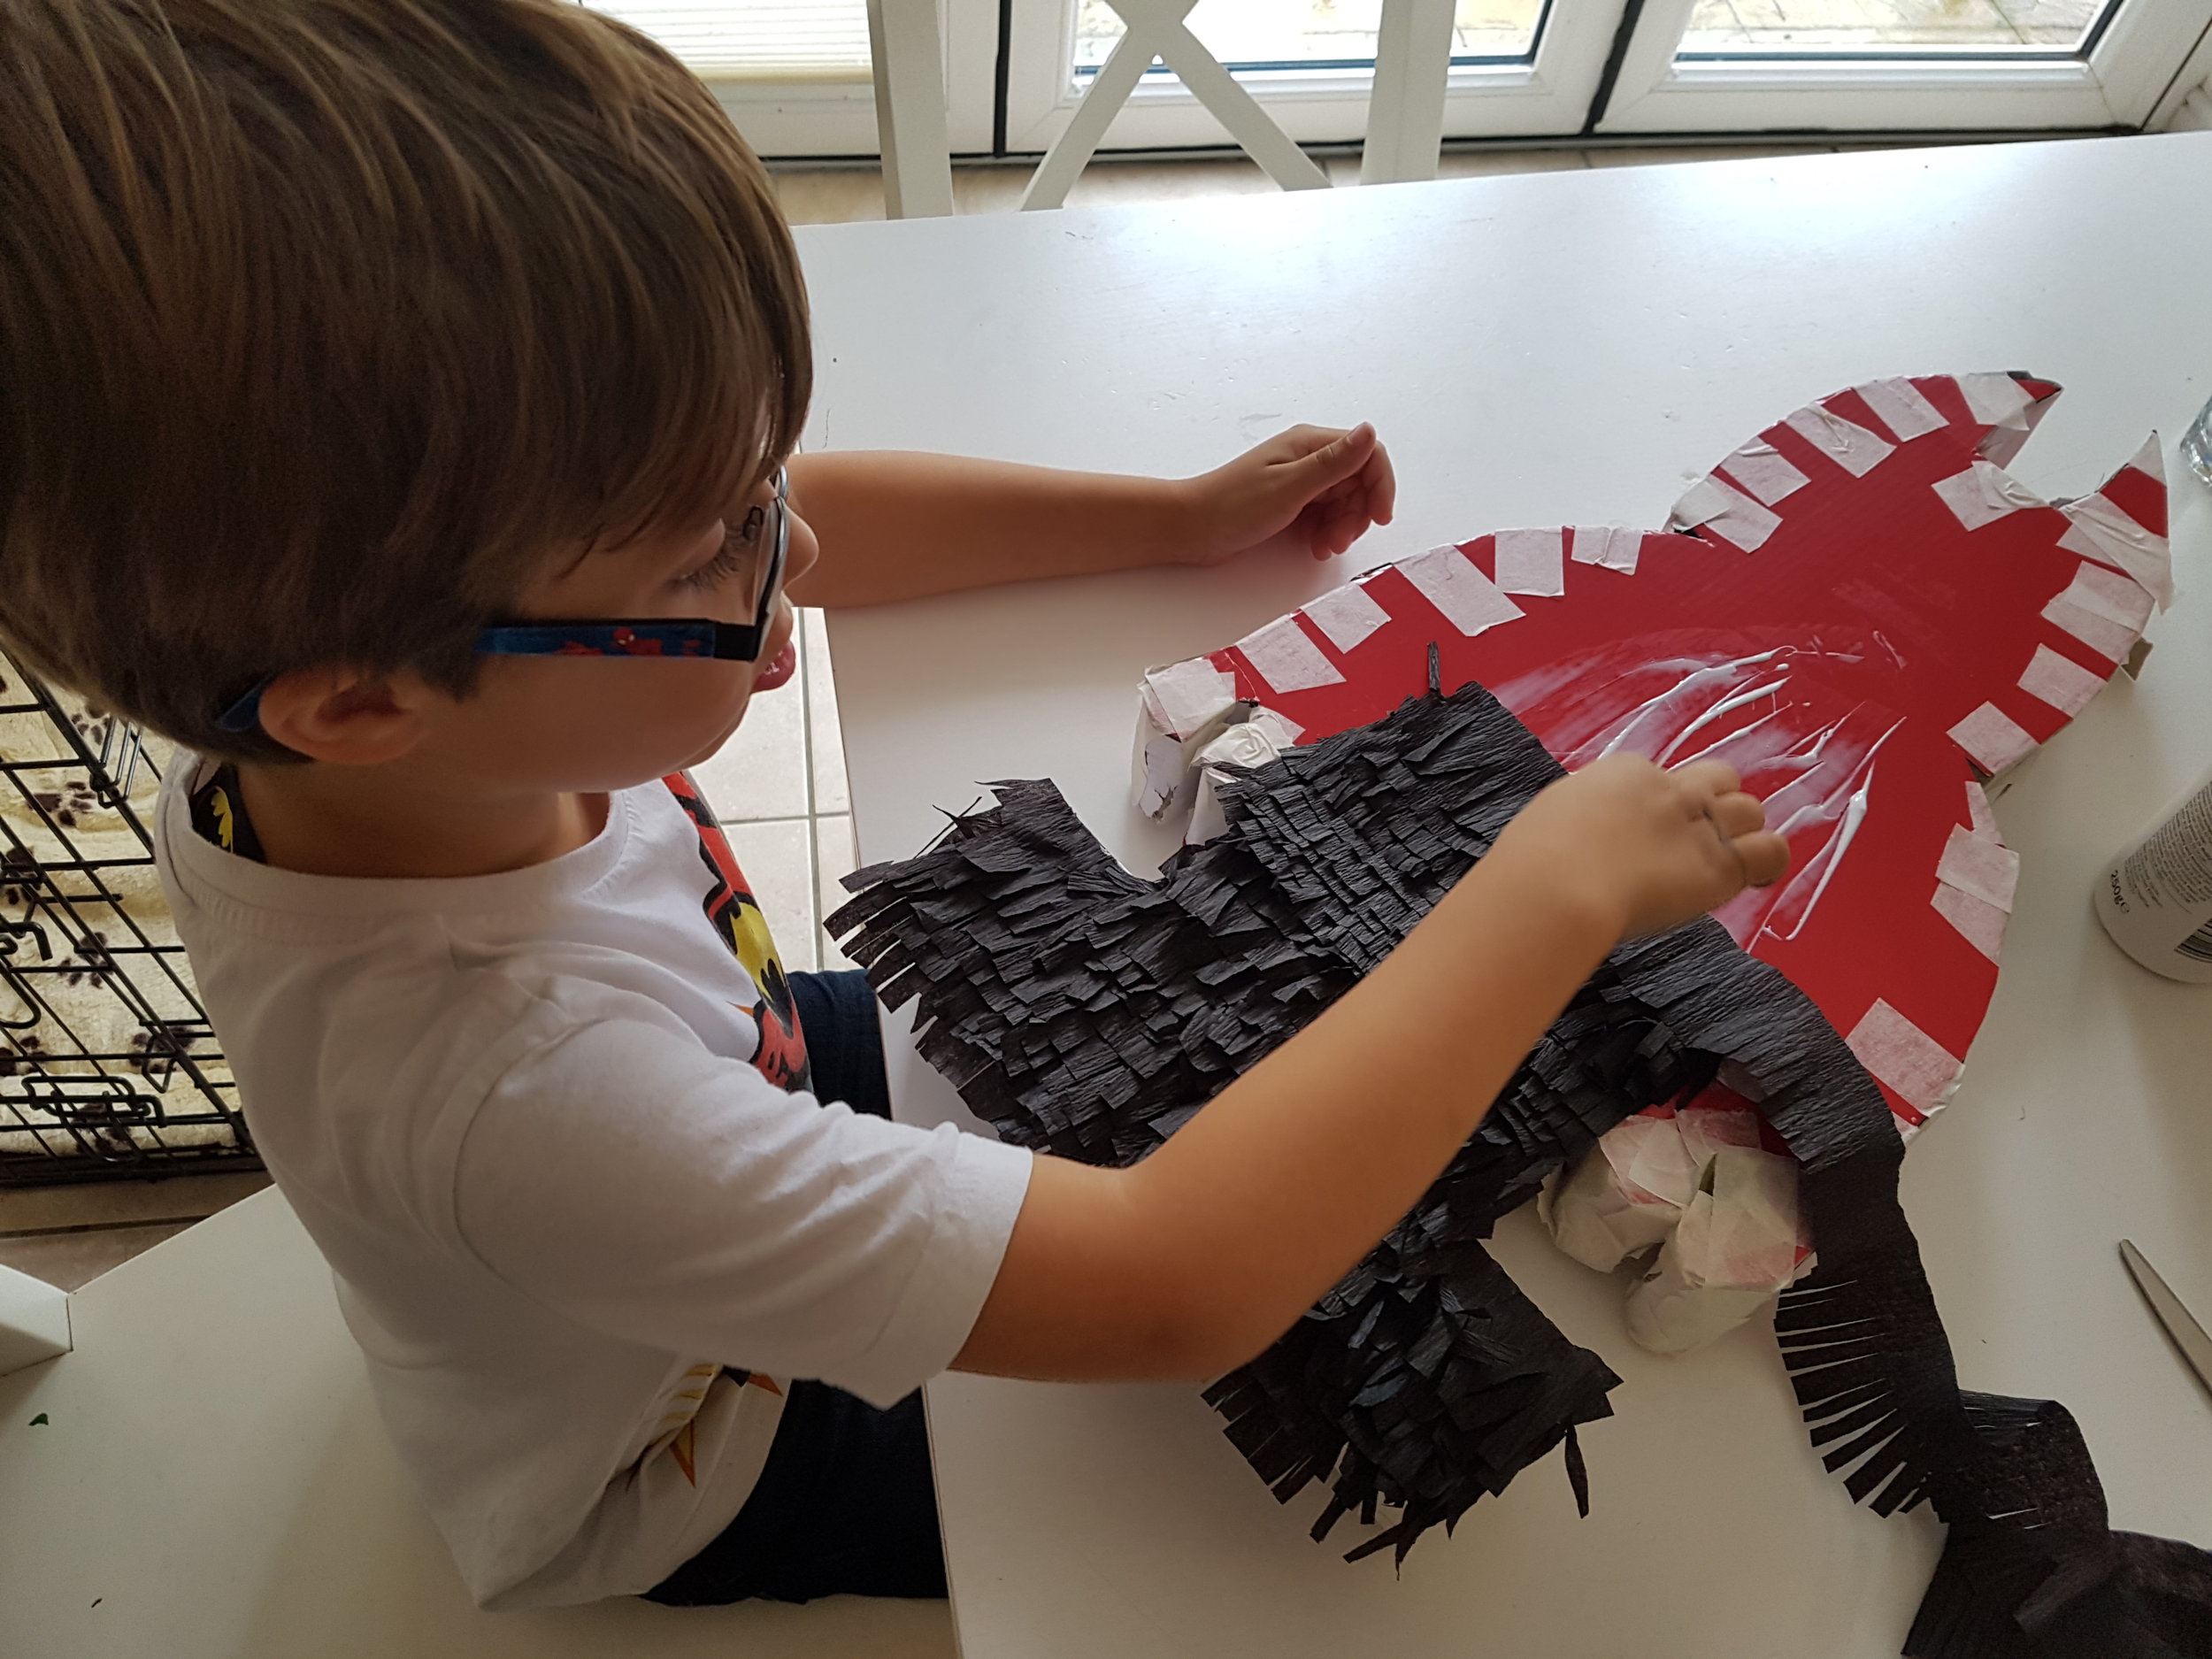
Now that you have the body covered, you will need to use some yellow crepe paper to add a belt.

We then printed off the batman symbol and a Lego batman face onto sticker paper and suck them onto the Piñata.
After that I drew his pec lines on with chalk.
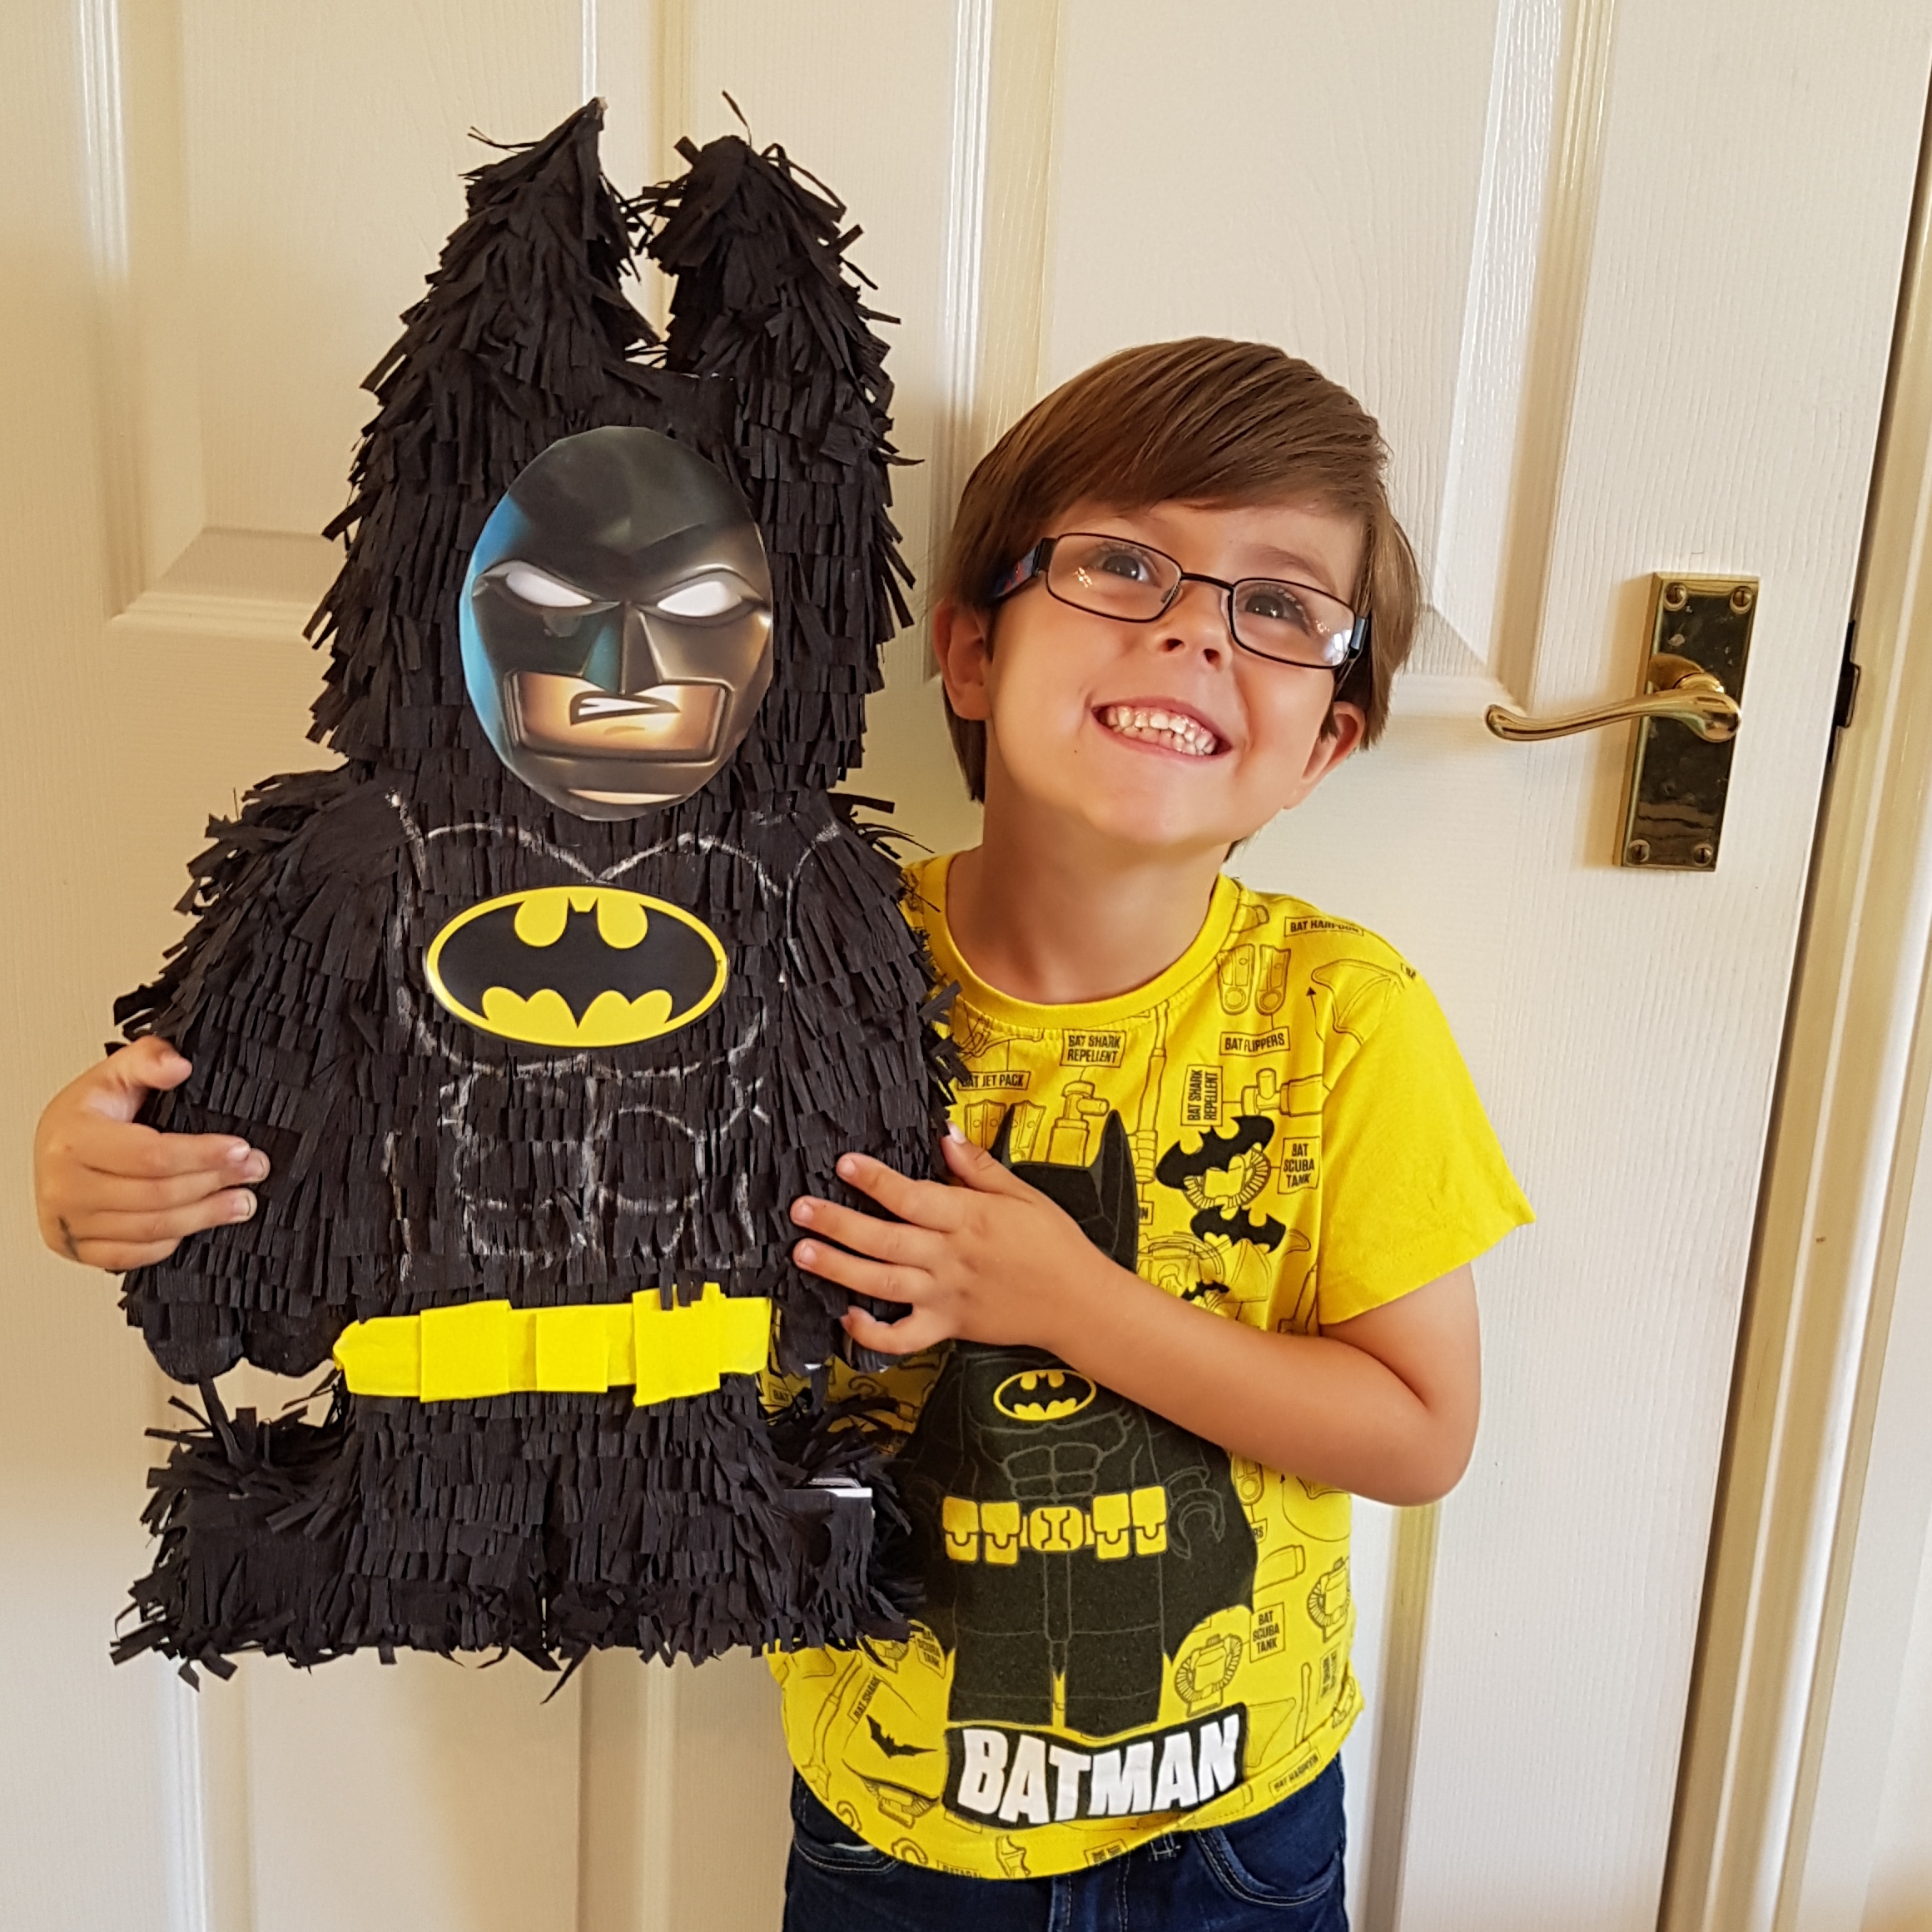
And here is the finished Piñata with a very happy little boy.